
How to Use Google Tag Manager: Setup, Event Tracking, and More!
How to Install Google Tag Manager
To almost any website analyst, digital marketer, or developer, Google Tag Manager is a true blessing. It allows easy modification of tracking/pixel codes, and judging from the fact that us marketers need snippets installed or modified just about every day, GTM is a huge time saver.
Sometimes you may not have a developer nearby, or at all, to help you install Google Tag Manager. The good thing is – you only have to do it once since after installing it you can modify it completely from the comfort of a cozy Google interface rather than struggling with line after line of code. It’s definitely a good investment of your time to learn how to install and implement it correctly.
Create a GTM Account
The first step to install GTM is to have a GTM account set up and ready to install. Simply go to http://tagmanager.google.com, sign in, and click the “Create Account” button at the top left.

Put in a name for your account and the container. These are all internal names for you for easy identification – the GTM container name should probably be your website’s address. Choose “Web”– assuming that’s what the container is for – and you’re good to go.
Find Your GTM Snippet
Now that your account is set up, you can take the GTM snippet and put it on your website. Find the link that starts with “GTM-” on the bar at the top right. This is the ID for your GTM container:

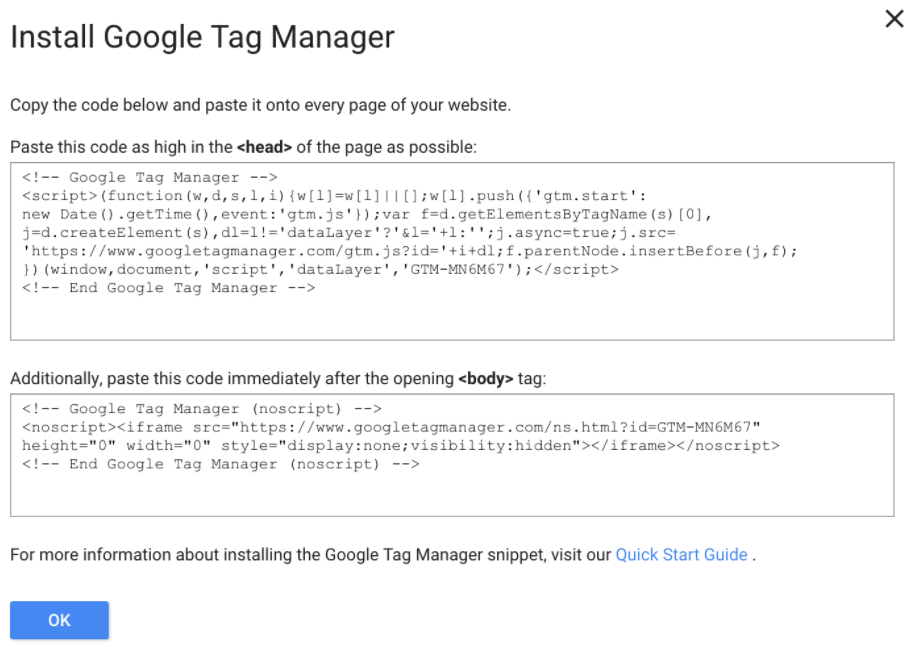
If you click on this ID, you’ll be greeted with two scary looking blocks of code, one larger than the other. To start working with Tag Manager, you copy and paste those blocks onto your website.
Install Google Tag Manager on WordPress
There are a bunch of ways to install Google Tag Manager on WordPress. It boils down to installing it manually versus using a plugin. Some plugins, like DuracellTomi’s GTM for WordPress, have some advanced capabilities to help you with tracking and are easy enough to set up. However, in case you want to do it manually, here’s how you do it.
Warning: Manually editing your website’s WordPress code might cause it to break. Make sure to make a backup by using one of the many WordPress backup plugins.
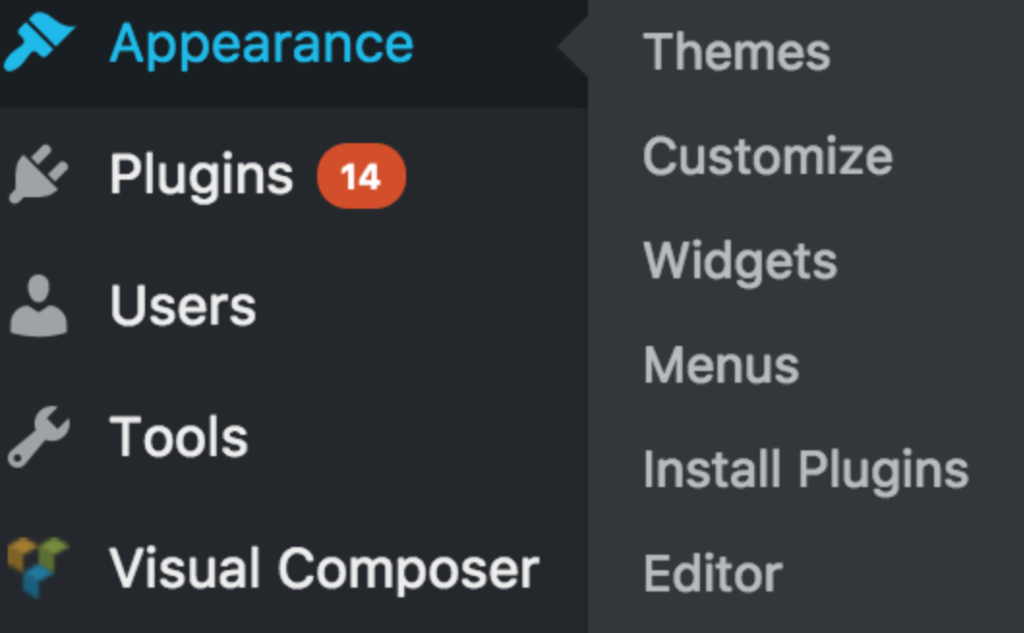
Login to your WordPress admin interface. Go to Appearance > Editor.
On the editor screen, look to the right, and try to find the “header.php” code file, and click on it. You’ll again be greeted with a scary block of code, and this time you’ll need to edit it.
As per Google’s own instructions, the top part of the tag snippet needs to go in between the <head> tags (so, somewhere after <head> and somewhere before </head>), and the bottom snippet needs to be somewhere in the <body> tag.
The header.php file will usually include both the header and body sections of your site, which makes it possible to install GTM in one go. Keeping in mind the <body> tag comes right after the <header> tag, find where the code needs to be pasted, and then paste it.
Here’s an example:
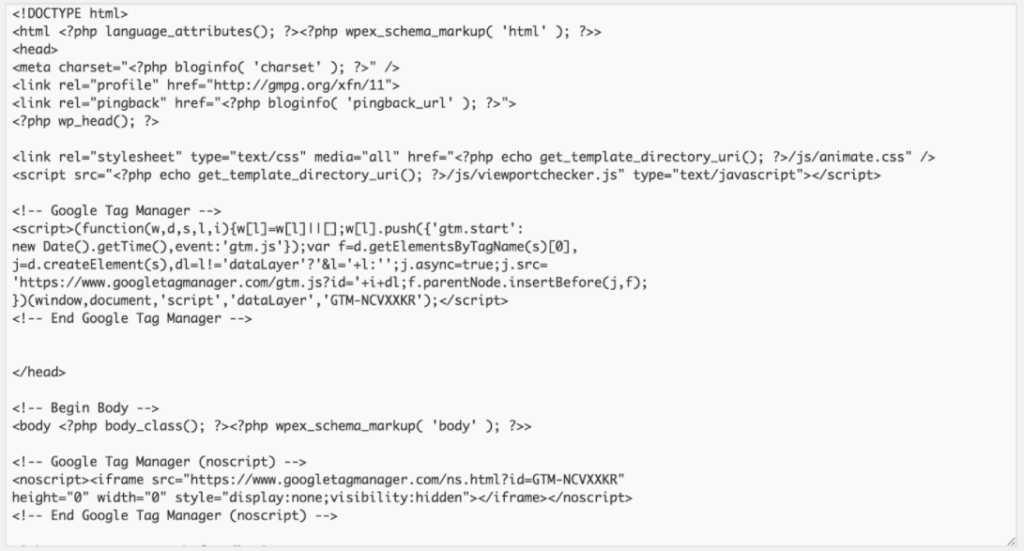
Note how the top tag is within the header tag, and the bottom one right after the opening of the body tag.
After editing the file, make sure all the tags are closed correctly and click Save/Update File. With this, your GTM tag should be live. But don’t take our word for it – be sure to test it for yourself.
How to Test Your Google Tag Manager Installation
Let’s go back to the GTM interface. There, you’ll find (at the top) a “PREVIEW” button. This button is right next to the GTM ID you clicked earlier to get the code. Click that button to enable Preview Mode, and you’ll be refreshed with an orange screen.

Now, it’s time to check if your code is working. Open a new tab within the same browser, and visit your website (not the admin interface but the actual website). At the bottom, you should see an entirely new frame, triggered by Google Tag Manager. This means the code is working.

Congratulations, you’ve just installed Google Tag Manager!
Next in the series, we’ll create our first tag and trigger, and will do some easy tracking/pixel implementations that will make your life much easier.