
How to Use Google Tag Manager: Set-up, Event Tracking, and More!
Setting up Google Tag Manager: Your First Tag and Trigger with Google Analytics
In the first two pieces of this series, we explained what Google Tag Manager is used for and how to install it correctly on WordPress. Now, we will go through the process of how to set it up and implement Google Analytics through Google Tag Manager.
Tags and Triggers
At the heart of Tag Manager lie tags and triggers. Tags are, in their core, pieces of code that are to be executed. Tags are tied to triggers. For instance, when certain conditions defined by the triggers are met, the tag that is tied to that trigger (or collection thereof) is executed.
As you might already know, Google Analytics–Google’s very powerful website analytics tool–gets its data from snippets of code, placed on every page of your website. Whenever a new page is loaded, the snippet on that page is executed and sends the Analytics server information about this new visit. Now, we can do that with Google Tag Manager.
The concept is simple. We create a tag on Google Tag Manager, which is going to act as the Analytics snippet. Then we will add a trigger to it–this trigger will be a simple “All Pages” trigger, meaning that the trigger will fire on all pages. This is ideal for Analytics.
Step 1: Get Your Google Analytics ID
First, let’s go to your Google Analytics account (create one if you don’t already have one – it’s easy) and look at what your Analytics ID. Just like we had to put your Tag Manager ID into your Tag Manager snippet, we have to put your Analytics ID into your Analytics snippet so Google knows who the account belongs to. This ID is in the form of “UA-XXXXXXX-X,” and can easily be found in the Admin/Properties tab.

Step 2: Create Your Analytics Tag in Google Tag Manager
Now that we have your ID, we can create the tag in Tag Manager. Simply go back to your account and on the left menu click on “Tags.” Then, click on the red “New” button on the right screen.
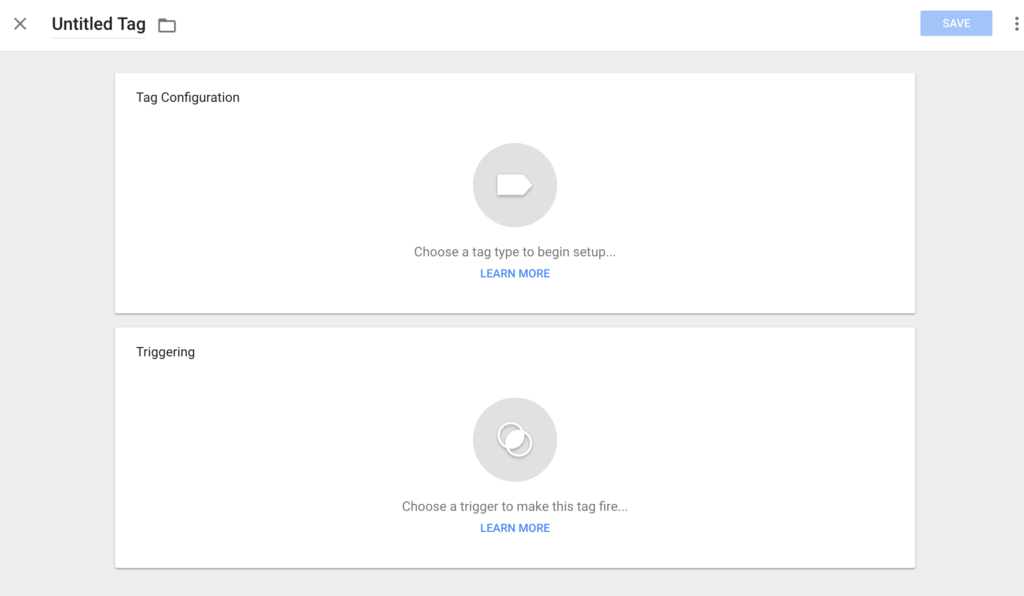
This new screen is divided into two–the top part is going to be your tag, and the bottom is the trigger that we will attach to it. Click on “Untitled Tag” and change its name to something that you will be able to easily remember (e.g., Google Analytics).
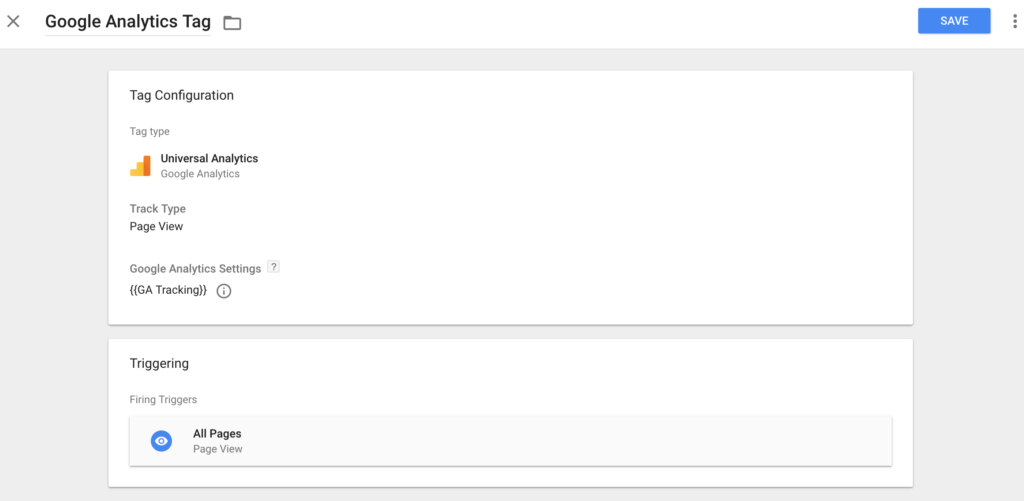
Now, click on Tag Configuration and on the menu to the right, click “Universal Analytics.” Make sure “Page View” is selected, because that’s what we want Analytics to record. Below, you will find the place where your Analytics ID should be entered. However, instead of simply typing in just the ID, turn it into a “variable” by naming it “GA ID.” This will ensure that the next time we have to use our Analytics ID anywhere in Google Tag Manager, we can simply write {{GA ID}} (with the curly brackets) instead of having to remember or look up the exact Analytics ID.
Under Google Analytics Settings, click on “New Variable.” Name this variable “GA ID,” enter your tracking ID in the box, and click Save. Now, {{GA ID}} will appear under the Analytics Settings dropdown as an option, which you should select.
Attach a Trigger to Your Analytics Tag
We have officially set up our Analytics tag and will need to attach a trigger to it. The concept behind it is easy–we simply want the Analytics tag to trigger on all pages. Click anywhere on the bottom half to bring up the trigger menu and select “All Pages.”
Once you click “Save,” you are done setting up your Google Analytics tag & trigger. Be sure to note the reminder within Google Tag Manager that the changes are not yet live on your website until you click “Save” on the top right. However, before you select that, make sure it is working correctly.
Check If Your Tag is Firing Correctly
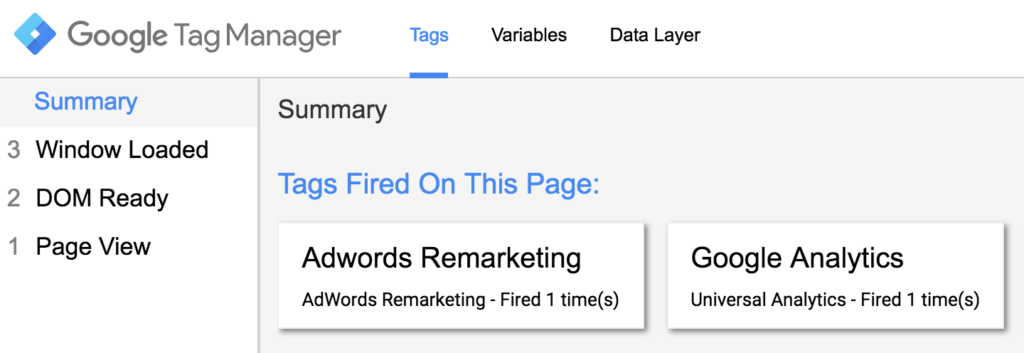
The best way to verify that everything is working correctly is to click on “Preview” at the top of your screen. If you were already in preview mode, click “Refresh” on the preview box. After you are in preview mode, open your website in a new tab. When the site loads, the Tag Manager debug box should appear at the bottom.
When it does, the right-hand side window will display a “Summary” of all tags that have fired as a result of your website. If you followed our Google Tag Manager set-up guide correctly, you will see that your “Google Analytics Tag” appears in the summary section of tags fired on this page.
Check If Analytics is Working Properly
Checking your Analytics is the last step before you “Publish” the tag. This quality assurance step is to verify that the right information is reaching your Google Analytics property through your Google Tag Manager container. Similar to the previous step, open your website in a new tab. After it loads, select a less-popular page on your site. After a couple of minutes, check your Google Analytics account to see if your visit has been accounted for. You can also check the “Real-Time” tab on GA to see if it’s showing a user from your location for the page that you’re on… that would be you.
Publish Your Tag
When you’ve made sure your tag is firing correctly and GA is recording your activity, it’s time to publish your changes live.
By selecting “Submit,” a window will appear requesting your input on what to name this version of your container, and how you would describe the changes you’ve made in this particular version. Whatever you do, make sure to take note of it–you want a consistent versioning and naming scheme so that whoever looks at it (this could even be you in the future) will have some kind of idea on what is going on.
Congratulations. You have successfully set-up your Google Tag Manager to fire Google Analytics. Most “pixels” are this easy to implement. For example, the Facebook, Twitter, and LinkedIn pixels are almost the same. All you have to do is create a tag and you attach an “All Pages” trigger to it.
Have fun and tag responsibly.